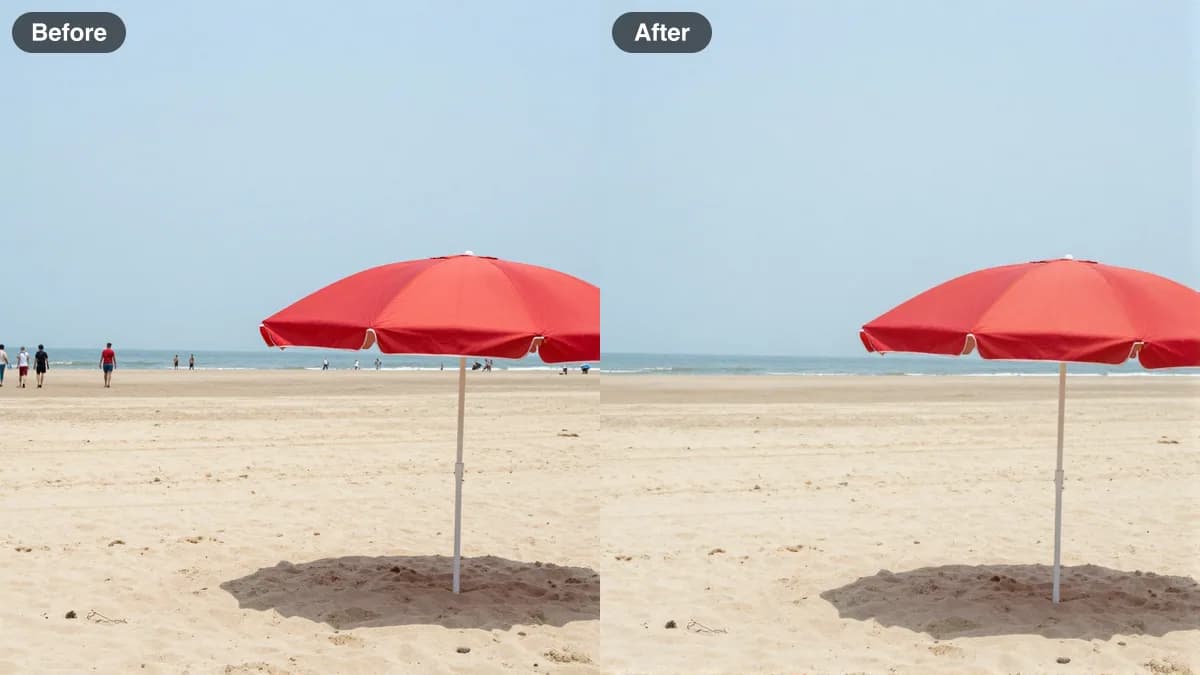
The right way to remove something from a photo depends on what you are removing, not on which tool has the best name. A stranger in the distance, a cable across the sky and a cluttered background call for three different approaches. This page compares them with a real before-and-after, gives the exact prompt for the instruction method, and says where AI removal should not be used.
Object removal methods at a glance
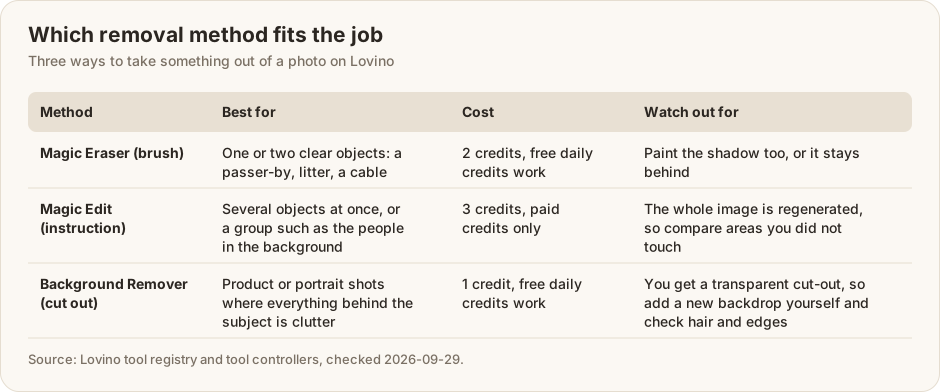
| Method | Use it when | Cost on Lovino |
|---|---|---|
| Magic Eraser (brush) | One or two clear objects: a passer-by, litter, a cable | 2 credits, free daily credits work |
| Instruction edit | Several objects at once, or a group such as the people in the background | Magic Edit 3 credits (paid credits), or an edit model in the Studio from 1 credit |
| Background Remover | Everything behind the subject is clutter | 1 credit, free daily credits work |
Method one: brush over it
Magic Eraser works from a mask. You paint over what you want gone, and the model fills the space so the background looks continuous. This is how the beach photo below would be marked: red over each distant walker.
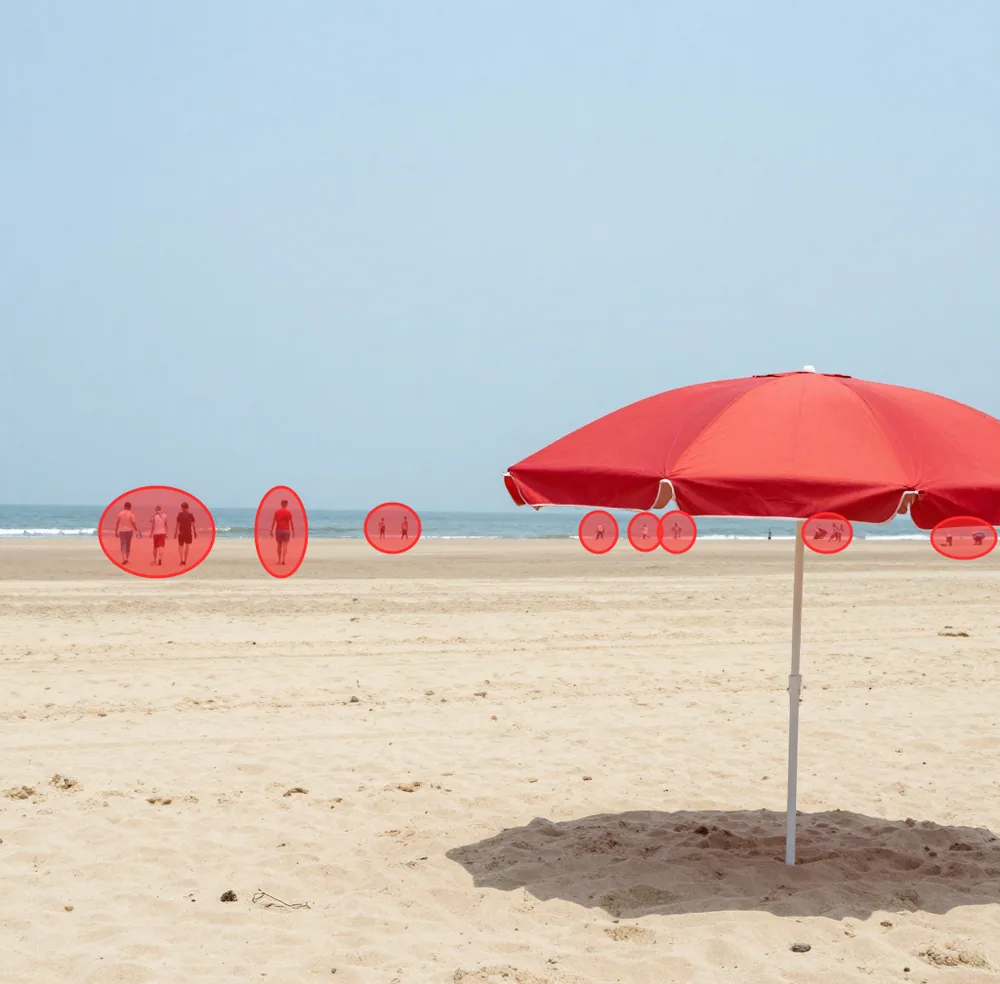
The red marks are drawn by hand for this article, not a screenshot of the tool. Three habits make the brush work better:
- Paint a little beyond the edge. A margin of background around the object gives the fill something to match.
- Paint the shadow and reflection too. A person gone but their shadow left behind is the classic giveaway.
- Work one object at a time on a busy scene. Each pass leaves a cleaner background for the next.
Magic Eraser costs 2 credits per erase, so the free plan's 3 daily credits (signup required) cover one erase a day.
The brush method, step by step
- Upload the photo and zoom in on the area.
- Brush over the object, its shadow and a thin margin of background.
- Run it, then check the fill for smearing or repeated texture.
- If it is wrong, adjust the brush area and run it again from the original.
- Keep the original file and download the result.
Method two: describe what should disappear
An instruction edit skips the mask. You write what to remove and what to keep. This example used FLUX Kontext Fast.
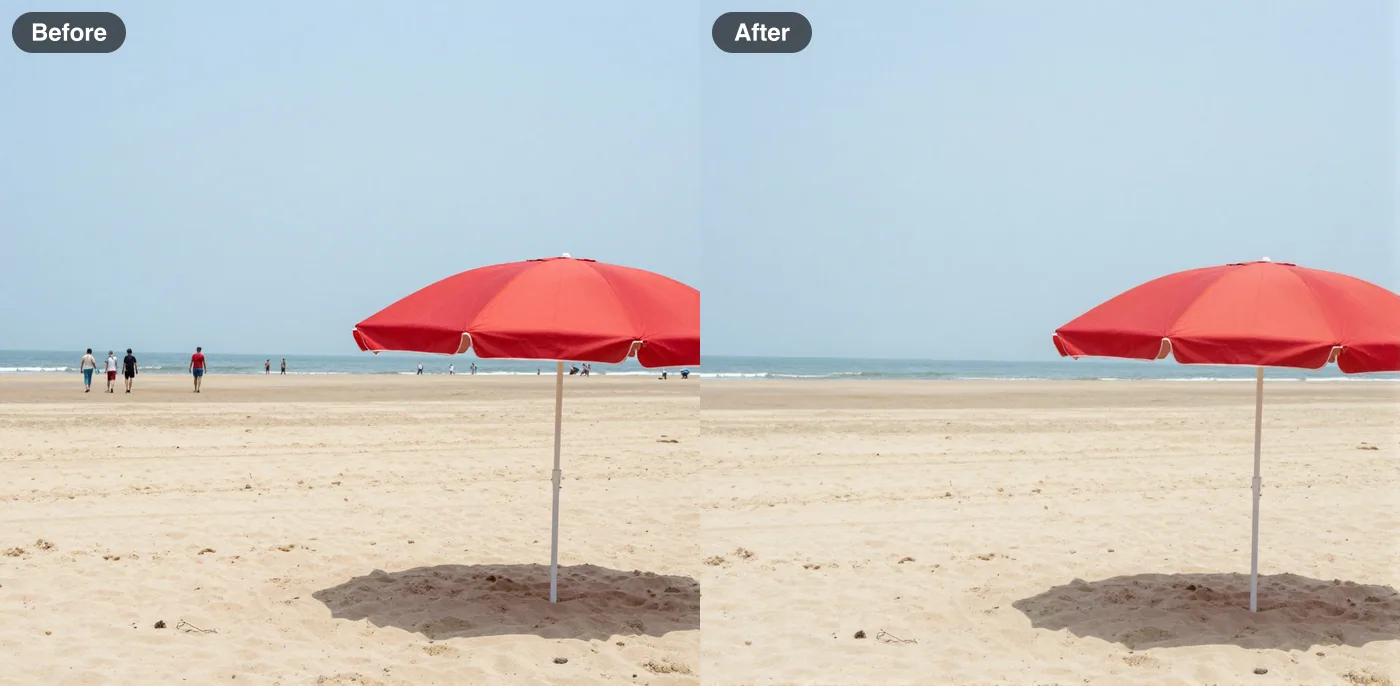
Prompt: Remove the people in the background. Keep the umbrella, sand and sea exactly the same.
Every walker is gone, and the red umbrella, sand and sea are in place. Look closely, though: the sea line and sand are a little smoother than in the original. The whole image is regenerated, so always compare areas you did not touch. The second sentence, "Keep the umbrella, sand and sea exactly the same", is there to tell the model what not to redraw.
Lovino's Magic Edit tool runs this kind of edit for 3 credits per image and needs paid credits. In the Studio you can pick an edit model such as FLUX Kontext Fast (2 credits) or FLUX.2 Klein (1 credit) and send your photo with the instruction.
How to write the instruction
Name the thing by what it is and where it is: "the people in the background" beats "clean this up". Add what to keep. On a detailed scene, remove one thing per run so each pass has a cleaner image to work from. If a result changes something you liked, make the keep clause more specific and run it again.
Method three: remove everything behind the subject
When the subject is fine and the whole background is the problem, do not erase object by object. Replace it. This edit turned a cafe table and coffee cup into a plain studio backdrop.
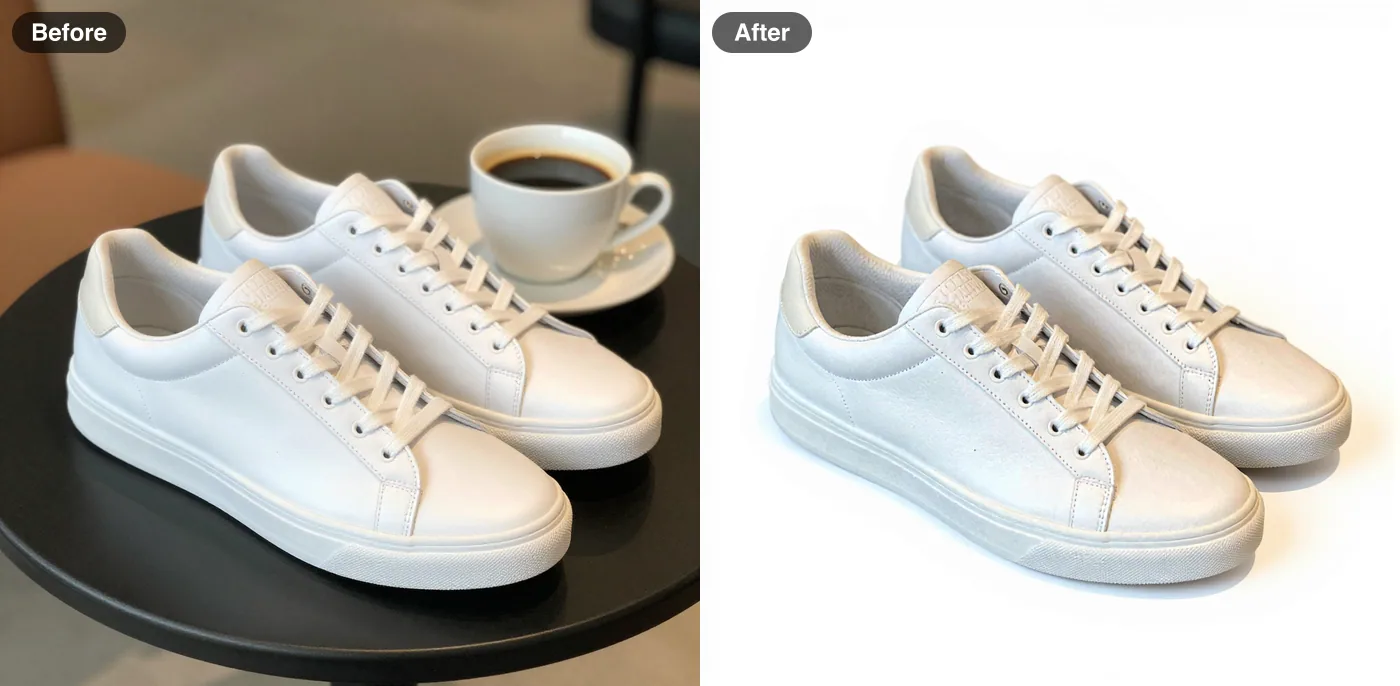
Prompt: Replace the background with a clean seamless white studio backdrop and soft studio shadow. Keep the sneaker exactly the same.
The Background Remover takes the other route: it returns a transparent cut-out for 1 credit, and you place the subject on your own backdrop. Check hair and edges on a cut-out, since fine detail is where they go wrong.
Which method for which job
Templates to adapt
These are patterns, not tested prompts.
- Remove [object]. Keep everything else exactly the same.
- Remove the people in the background. Keep [foreground subject] and the [setting] exactly the same.
- Remove the text on the [sign]. Keep the sign and the wall the same.
- Replace the background with [a plain colour or scene]. Keep [subject] exactly the same.
Common removal jobs
| Job | Good starting method | Note |
|---|---|---|
| A stranger in the background | Brush, or an instruction that names the group | Paint or name their shadow too |
| A cable or pole across the sky | Brush | Thin objects are quick to mask |
| A date stamp on your own photo | Brush | Only on photos you own |
| Clutter on a table or desk | Brush, one item at a time | Compare table texture afterwards |
| A whole messy background | Instruction edit or cut-out | Check edges and shadows |
Which photos are easier
- Easier: plain or uniform surroundings such as sand, sky, water or grass, where the fill has little to get wrong.
- Harder: repeating patterns such as brick, tiles or fabric, where the fill can smear or repeat.
- Hardest: objects that overlap a face or a line of text, because a wrong guess is obvious.
What the fill cannot know
The model invents whatever was hidden behind the object. If a pole crosses a window, the filled area is a plausible window, not the real one. That is fine for a holiday photo. It is not fine where accuracy matters: a listing photo should not hide a real defect or fixture, and a survey or insurance photo should not be altered at all. Clutter can go. Facts should stay.
Where AI removal should not be used
- Copyright watermarks. Removing a watermark from an image you do not own is not appropriate. Use these methods on your own photos.
- Evidence and news. Do not remove people or objects from a photo that is presented as a record of an event.
- Product accuracy. Do not erase a defect from a product photo and then sell the product as flawless.
When a desktop editor is the better tool
For a single small blemish on a photo you will print, a clone or healing tool in a desktop editor gives you exact control, and the result is the same every time you open it. AI removal is faster and needs no skill, but it is less predictable. Use it when speed matters more than pixel-level control, and keep the original file either way.
Keep going
Try the brush method in the Magic Eraser. For a wider walkthrough see our AI magic eraser guide and the AI background remover guide. If you want to change something rather than remove it, AI photo editing prompts has real examples.